I use mRemoteNG as my primary tool for remote access to both Linux and Windows machines. I recently had a need to set it up to access a Linux VM created on Amazon’s AWS EC2 services. It mostly went smoothly, except I did run into one issue with permissions.
Specifically, the EC2 VM had ssh access controlled via a private key, and not your typical password login. This allows you to restrict access not by giving someone the login and password, but by giving them a specific private key file.
To jump ahead, my mistake was that I placed the key file into a program files folder where special permissions were required. When mRemoteNG was loading that file, the permissions were actually too open, and putty would complain about it without showing a message in mRemoteNG. When I ran the manual ssh attempt, I saw the message:
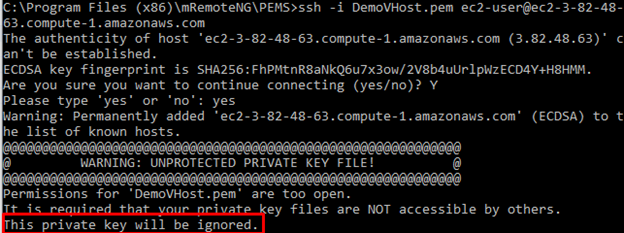
Again, that’s because of where I placed the private key. If you place it in your documents folder, you will not have this issue. There are 4 key steps to follow here, some of which you may not need:
- Create an AWS Virtual Machine
- Convert the PEM file to PPK
- Setup Putty with the settings
- Setup mRemoteNG to use new Putty setting
Create an AWS Virtual Machine
In the AWS dashboard, select to create a new instance with Launch Instance:

We will select a RedHat Linux instance:

For this demo, select a Free tier instance:

Select Review and Launch and then Launch:


You will be prompted to create a key pair with the following dialog:
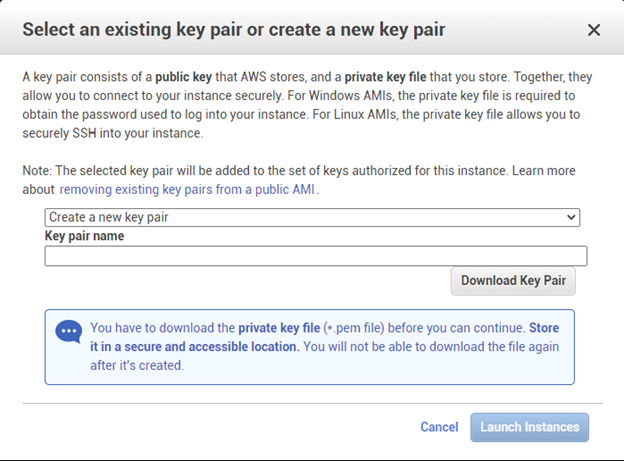
Enter a new key pair name (or reuse existing one. We decided on DemoVHost):

This will download a file with the Key pair name. Make sure to save this file somewhere safe, you will need it later:

Click the Launch Instance button. Back in the instances, your new VM should start soon:
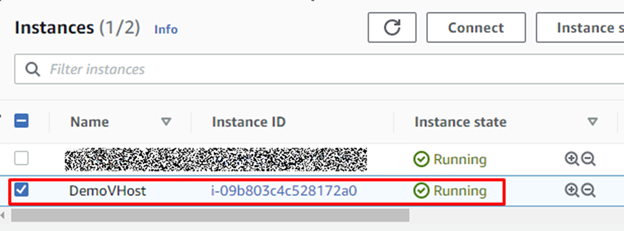
In the instance details, make note of the DNS name:

You can now proceed to setup Putty settings.
You can not proceed to Convert the PEM file to PPK.
Convert the PEM file to PPK
You need to convert the PEM file we downloaded earlier into a PPK file. Wherever you store this file, you need to make sure that you are the only person who has access permissions to it. That may mean running puttygen as an administrator, and after this process changing the generated ppk file permissions so that only you have access to it (or, you can just store it in your documents folder somewhere).
Run the puttygen program. I downloaded mine from https://www.putty.org/:
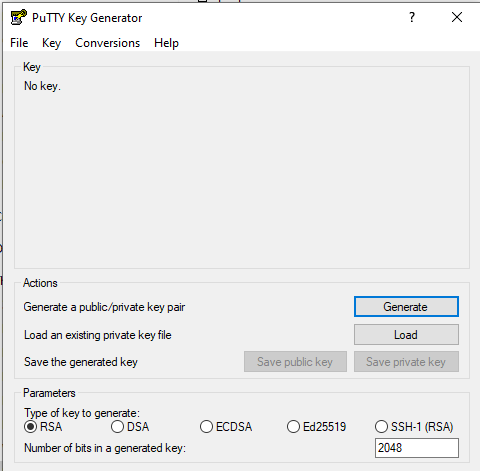
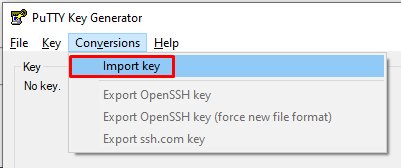
In Putty Generator, select Conversions / Import Key:
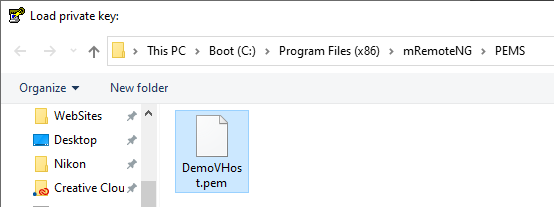
Select the PEM file you just downloaded from AWS:
In the next dialog, you can enter a passphrase, or leave it blank (you will get a warning), but click the Save private key button:
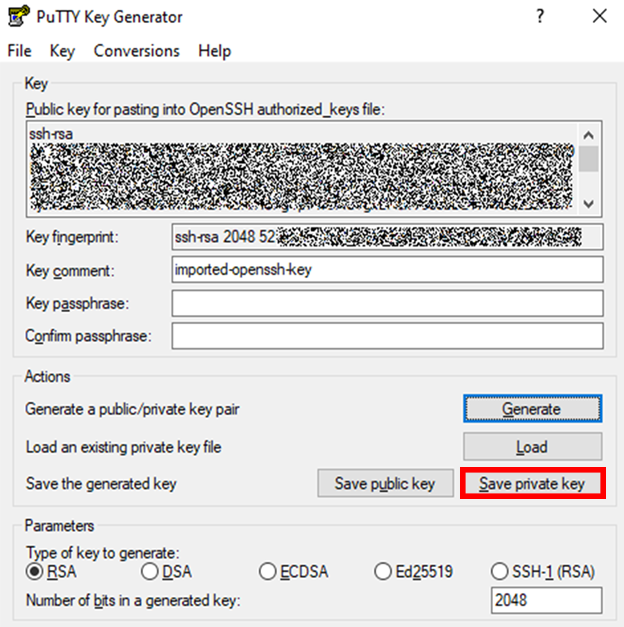
You can close the generator now, and proceed to Setup Putty with the settings.
Setup Putty with the settings
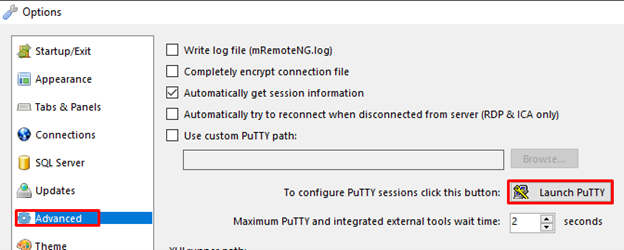
In mRemoteNG, select the Tools / Options menu choice:
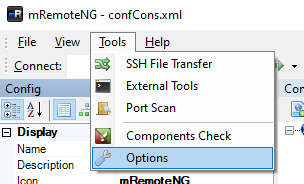
Select the Advanced option, and click the Launch Putty button:
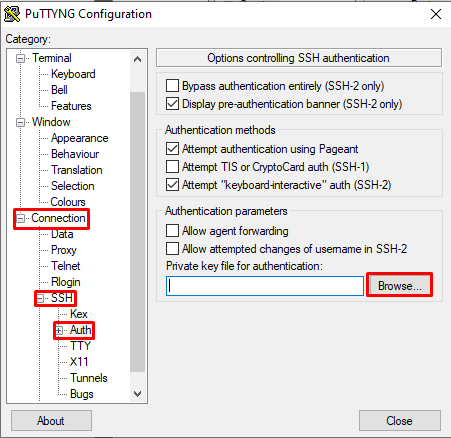
In Putty, go to the Connection / SSH / Auth item in the left bar, and select the Browse… button, and elect the PPK file that you generated previously:
Go to the Session item on the left panel, enter a new name in the Saved Sessions field, then click Save:
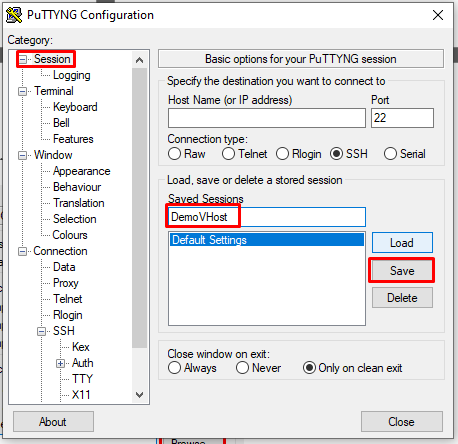
Confirm your new name is in the Saved Sessions area, and click Close.
You can now proceed to Setup mRemoteNG to use new Putty setting.
Setup mRemoteNG to use new Putty setting
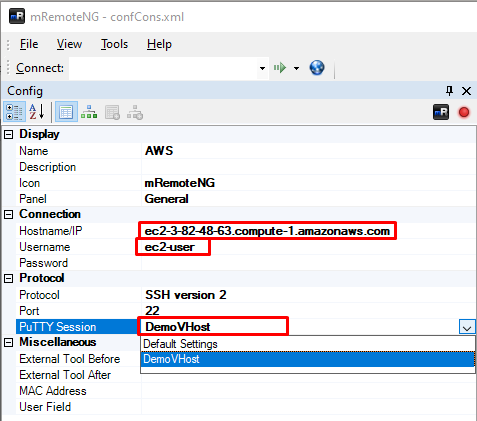
In the configuration settings for your mRemoteNG connection, update the following:
- Set Hostname/IP to the DNS name noted earlier.
- Set Username to ec2-user
- Set Putty Session to the new settings you saved previously in putty
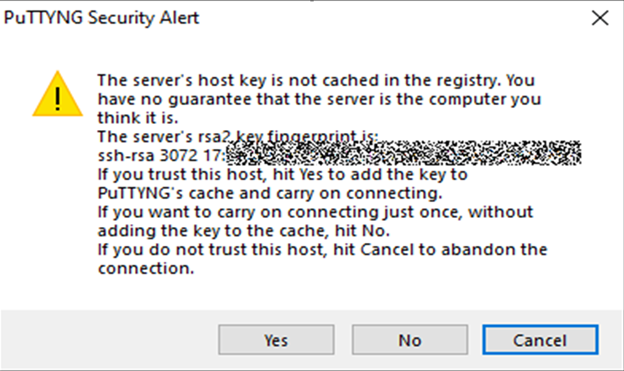
When you connect, you will get the normal putty message about the host key not being cached. Just click Yes:
You should now be connected remotely:
